How to bypass Signature Adoption in Docusign embedded signing flows
Leverage the eSignature REST API endpoint to upload a custom signature image, ensuring that your signers can jump straight into the document.

One of the most critical elements of a smooth embedded signing experience is minimizing steps and clicks for your users. In high-volume workflows, asking every user to Adopt Your Signature can disrupt the flow and lead to drop-off.
The good news? You can completely bypass the Docusign signature adoption screen by proactively using the Docusign eSignature REST API to upload a signature image on the signer’s behalf before they ever launch the signing ceremony.
This article shows you how to leverage the Update Recipient Signature Image endpoint to upload a custom signature image, ensuring that your signers can jump straight into the document.
Why bypass the signature adoption process?
When a user signs a Docusign document for the first time, they are typically presented with the Adopt Your Signature screen, where they choose to Select Style or Draw their signature.
This default experience requires 1-3 extra clicks to adopt and confirm the signature adoption which can interrupt a fast workflow by being a small point of friction.
With our enhanced experience (bypassed), the user will not be shown the Adopt Your Signature screen and, instead, only see the content of their document. No extra clicks are required, leading to a completely seamless & frictionless process.
By preloading a signature, the Docusign platform recognizes the signer is ready, eliminating the need for the adoption step and accelerating the embedded workflow.
Prerequisites for preloading the signature
Before you call the Docusign eSignature REST API, you need three key pieces of information, all of which you likely already have when sending an envelope for an embedded signing experience:
Envelope ID: The ID of the envelope associated with the signing session.
Recipient ID: The ID of the signer who will have their signature preloaded (e.g., 1001).
Signature Image: The actual image you intend to use for the signature which must be less than 200K and in either gif, png, jpeg, or bmp format.
API implementation: Use the Update Recipient Signature Image endpoint
To preload a signature image on our signer’s behalf, we will use the Update Recipient Signature Image endpoint. A similar endpoint to provide an image of the signer’s initials is also available.
Endpoint:
PUT /restapi/v2.1/accounts/{accountId}/envelopes/{envelopeId}/recipients/{recipientId}/signature_image
Request body schema:
The request body requires the image in binary format.
Field | Type | Description |
| String | The external account number (int) or account ID GUID. |
| String | The envelope's GUID. |
| String | A local reference used to map recipients to other objects, such as specific document tabs. |
Example code snippet
The following structure outlines the payload you need to send with your PUT request.
PUT /v2.1/accounts/{accountId}/envelopes/{envelopeId}/recipients/{recipientId}/signature_image HTTP/1.1
Host: demo.docusign.net
Authorization: Bearer YOUR_ACCESS_TOKEN
Content-Type: image/jpeg
Accept: application/json
Content-Lenght: xxx

"<file contents here>"
Summary of the flow for a seamless user experience
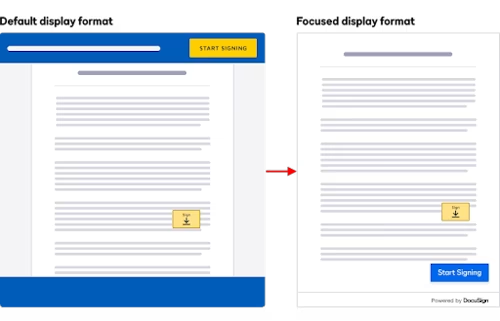
To achieve the best embedded signing experience, you can also combine this technique with Focused View. As a summary you will end up with the following steps for your integration:
Send the envelope: Create and send the envelope (standard API call).
Upload signature image: Upload an image of the signature using the Update Recipient Signature Image endpoint as described in the previous section.
Get recipient view URL: Call the Recipient View endpoint (standard API call).
Launch embedded signing using focused view rather than our default signing UI :

Conclusion
By proactively managing the recipient's signature image using the Update Recipient Signature Image endpoint, you remove the adoption step from the user’s journey, leading to a much faster, cleaner, and more professional embedded signing experience. It’s a simple, high-impact optimization that significantly improves completion rates and user satisfaction.
Additional resources
View the full API specification for the Update Recipient Signature Image endpoint.
Learn how to combine this technique with Focused View for a modern signing interface.

Arnaud Lesueur has been with Docusign since 2015 in various presales roles within EMEA. Over the years, he's been working with hundreds of our customers to digitalize their agreement processes. With a strong background across the complete Docusign portfolio, Arnaud received his Gold Certified Presales Agreement Cloud Expert designation in 2023. Arnaud can be reached at arnaud.lesueur@docusign.com.
Related posts


Docusign IAM is the agreement platform your business needs
