
Hello world with the Apex Toolkit
The Apex Toolkit makes it easy to build integrations with Docusign and Salesforce using Apex code. To get you started, I’ll walk you through installing the Apex Toolkit and writing your first code to send an envelope.

Installing the Toolkit
Log in to your custom Salesforce domain to configure the Apex Toolkit.
Navigate to the Salesforce App Exchange and enter “Docusign eSignature for Salesforce” in the search box.
Select and install Docusign eSignature for Salesforce Essentials:
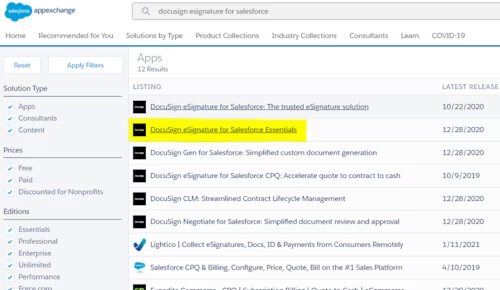
While going through the installation steps, you will need to approve the requested third-party access:

Check that the Docusign Apps Launcher package is installed. To do so, navigate to Setup in Salesforce. In the search box, type Installed Packages, then select Installed Packages. After the installation is complete, the Docusign Apps Launcher app will be available in your Salesforce org’s list of installed packages.
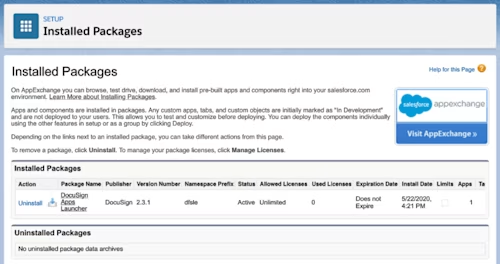
Connect your Salesforce and Docusign accounts
Next, connect your Docusign account to your Salesforce instance. If you do not have a Docusign Developer account, you can create one for free.
Navigate to Setup in Salesforce, click the App Launcher button, type Docusign, then click Docusign Apps Launcher from the list.
When you open the Docusign Apps Launcher app for the first time, you need to log in to your Docusign account. Click Advanced Options, then click Log in to Demo Account.
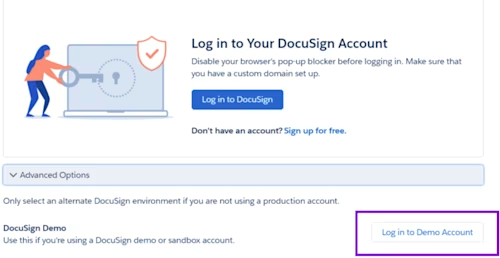
Log in with your Docusign developer account credentials, then click Accept to grant the requested permissions.
Under Select Account, be sure your account is selected; then click Next.
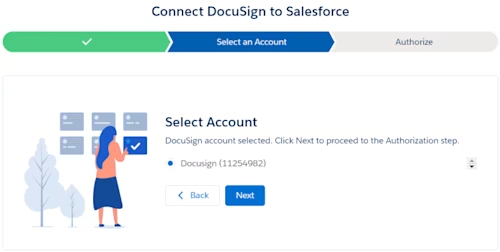
Hello World! Sending an envelope with the Apex Toolkit
The Docusign Apps Launcher package includes the Apex Toolkit. Now that your Salesforce and Docusign accounts are linked, you’re ready to send a Hello World envelope. For your first envelope, you will use a Salesforce Account as the source object.
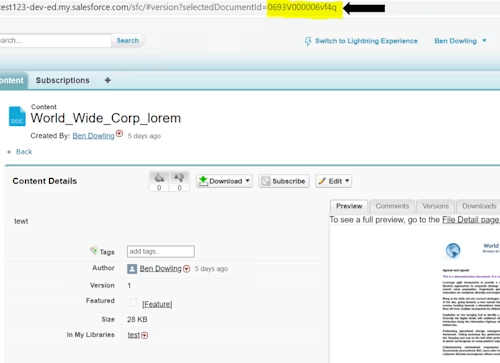
You will use a file located in a Salesforce Library. Once you have added the file to a library, please take note of the DocumentId, which you can see in the URL of the selected document.
You will also need to have an Account object set up for this demonstration. Please view this tutorial on how to set up an Account object in Sales Cloud.
For Apex programming, I recommend using Visual Studio Code with the SFDX plugin. If you do not have this plugin, simply open the Developer Console from within Salesforce, copy in the following code, and run it:
final String SIGNER_NAME = 'Signer name';
final String SIGNER_EMAIL = 'signer_email@example.com';
final string DOCUMENT_ID = '0693V000006vf4q';

final Account myAccount = [SELECT Id FROM Account WHERE Name = 'Edge Communications'
    LIMIT 1
    ];

//The ID of a document stored in a Salesforce library
final Id myFileId = [SELECT id from ContentVersion where ContentDocumentId = '0693V000006vf4q'
    LIMIT 1
    ].id;

// Create an empty envelope It needs to be associated with a
// Salesforce object. We’re using an account object.
dfsle.Envelope myEnvelope = dfsle.EnvelopeService.getEmptyEnvelope(
  new dfsle.Entity(myAccount.Id));

//Returns a list of Documents with the given fileID(s)
final List<dfsle.Document> doc = dfsle.DocumentService.getDocuments
   (ContentVersion.getSObjectType(), new Set <Id> {
   myFileId
});

//adds document to the Envelope
myEnvelope = myEnvelope.withDocuments(doc);

// Create an Signature tab
dfsle.Tab mySignatureTab = new dfsle.SignHereTab()
    .withRequired(true) // Signing mandatory
    .withPosition(new dfsle.Tab.Position(
     1, // The document to use
     1, // Page number on the document
     193, // X position
     168, // Y position
     null, // Default width
    null)); // Default height

dfsle.Recipient myRecipient = dfsle.Recipient.fromSource(
    SIGNER_NAME, // Signer name
    SIGNER_EMAIL, // Signer email
    null, // Signer phone number
    'null', // Signer role parameter is required
    null) // No Salesforce association
    .withTabs(new List < dfsle.Tab > { // Associate the tabs with this recipient
    mySignatureTab
    });

// Add recipient to the envelope
myEnvelope = myEnvelope.withRecipients(new List < dfsle.Recipient > {
    myRecipient
    });

myEnvelope = dfsle.EnvelopeService.sendEnvelope(
    myEnvelope, // The envelope to send
true);Sending the envelope
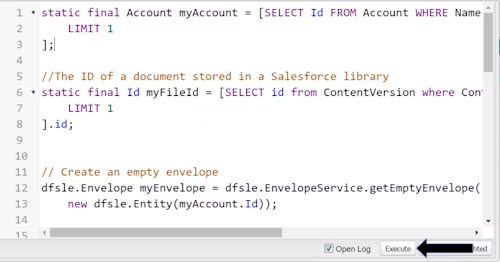
Once you have the code entered in the Developer Console, select Execute at the bottom right of the console.
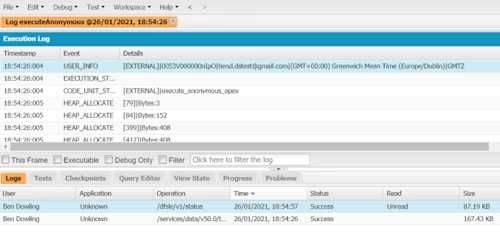
You should see a “Success” status in the console window once your code has run.
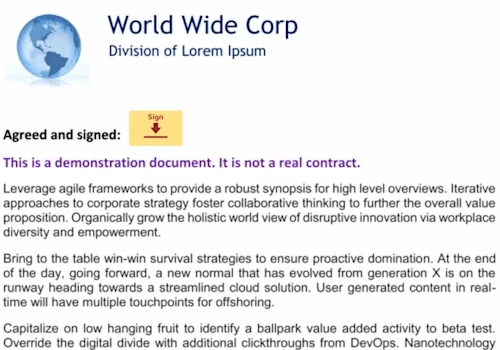
The document will be delivered to the intended signer’s email address.
Summary
Now you know how to send a simple envelope by leveraging the Apex Toolkit. If you have any issues, please do not hesitate to post on our Stack Overflow community with the tag docusignapi or contact us via Docusign Support.
Additional resources

Ben is a part of the Docusign Developer Support group, which helps developers integrate their applications with Docusign.
Related posts
Docusign IAM is the agreement platform your business needs


