
Automate even more with Docusign for Nintex

If you’re a power user of Nintex, then you’ll want to know about Docusign’s Nintex integration. As I’ll demonstrate below, it’s easy for you to use Docusign’s core eSignature capabilities within Nintex, saving you time and hassle when getting those important business agreements signed.
Already, fans of Nintex will know that it’s a great tool for streamlining repetitive tasks and making processes paperless. It’s why the tool is such a great fit with Docusign: we’re all about going paperless and automating key tasks, too.
Example: Send an envelope via SMS when a new Nintex form is completed
The example I’m using in this article is triggered when a new form is completed. Note that the same workflow can be easily configured for a different trigger to meet your specific business needs; for example:
In procurement, when a tender/project status is changed in a SharePoint list, a trigger could send an approved contract for execution.
In HR onboarding, when a new employee is added, a trigger could send the onboarding pack (personal profile, payroll data collection, NDA, etc) through an approval and signature workflow
In Sales, a trigger could send a contract via SMS Delivery to close the deal faster.
This is an example of a custom workflow built using the Docusign eSignature REST API. Note that you can also access a great range of Docusign pre-built connectors within Nintex that require zero code. You’ll find this super useful in more advanced scenarios where access to the full API provides even more options, such as SMS Delivery, ID Verification, or Conditional Routing.
As you’ll see below, the whole process is completed in three steps. First, you need to set up Docusign; next, make some quick changes to the actual document for signing; and finally, set up Nintex. Since it uses the Docusign API, the process follows the standard Go-Live process, which means you need to use your Docusign developer account (which you can create for free at the Docusign Developer Center). Once your workflow is complete, you can promote it to a production account using that same Go-Live process.
Step 1: Docusign setup
Login to your Docusign account and make a note of your Account ID (see top left)
Obtain an integration key, a special key that enables API-level authentication:
Go to Integrations > Apps and Keys and note down the Account Base URI. I will refer to this as the Base URL.
Select Add App / Integration Key, note down the integration key (used as the client ID for authentication)
Select Authorization Code Grant
and then Add Secret Key, and copy the secret key, saving it securely. (The page only shows it to you once; from then on, you’ll never be able to show it again.)
Under Additional settings > Redirect URIs, select Add URI and add the following, based on your Nintex tenant location:
US tenants:
https://us.nintex.io/connection/api/TokenEU tenants:
https://eu.nintex.io/connection/api/TokenAU tenants:
https://au.nintex.io/connection/api/Token
Please note down this value of the Redirect URI for now.
Create custom fields
- Go to Signing and Sending > Document Custom Fields, and then select Add Document Field in the upper right.
- Choose which fields you’d like to add (such as signature, name, or signing date) and follow the prompts. For example, if you want to add a Signature field, the recommended values are:
Name: Signature
Type: Sign Here
Shared: Tick (yes)
AutoPlace Text: \s{r}\
Step 2: Signing document setup
You only need to make minor changes to the document you want signed, to flag where the Docusign tags/fields should appear (see “Create custom fields” above). Simply enter the special AutoPlace text you created when setting up custom fields anywhere in the document that you want those fields to appear.
For example, the image below shows a Word document that needed two signers: “\s1\” for the first signer, “\n1\” for the full name of the signer, “\d1\” for the date of signing, and “\x2\” for all the details of the second signer.
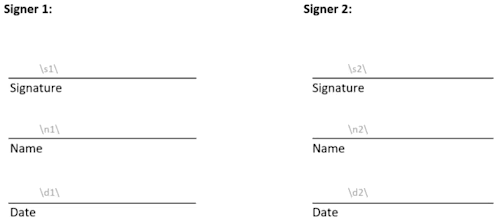
Just remember, in your final version, make the AutoPlace text white in color (so it’s hidden from view)!
Step 3: Nintex Setup
Now you need to create a private connector in Nintex and then create your workflow.
Create a private connector
The workflow you create will utilize the Xtensions capability within Nintex, which enables you to create new connectors easily with a Swagger file.
To make things easier, I’ve included a Swagger file for Nintex to get you up and running. This file includes two main API calls: POST Envelopeand GET Envelopes. To set up the private connector, follow these steps:
Download the Swagger file from the Docusign public GitHub.
Note: This is set up for Docusign developer/demo accounts. See below the changes needed for production.
Go To Nintex > Xtension and add a new private connector (as of this writing, click the ‘+’ button on the far right).
Upload the Swagger file and select Next.
Enter the client ID and secret key (captured earlier).
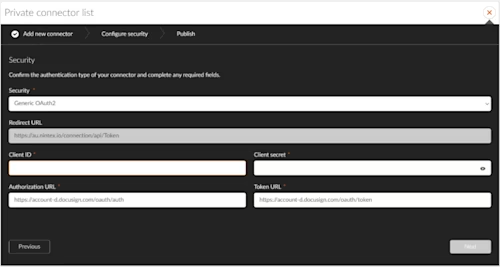
Optional: Once you’re ready to move to production, simply change the following two values and follow the go-live process previously mentioned (best to make two connectors, one for each environment):
DEMO:
Authorization URL (DEMO): https://account-d.docusign.com/oauth/auth
Token URL (DEMO): https://account-d.docusign.com/oauth/token
PROD:
Authorization URL (PROD): https://account.docusign.com/oauth/auth
Token URL (PROD): https://account.docusign.com/oauth/token
On the next screen, add a description and select a logo. I suggest this one:
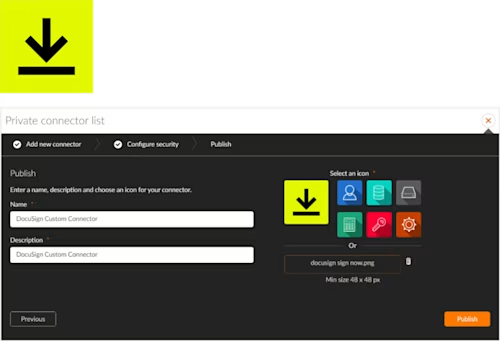
Click Publish, and you’re done with setup.
Create the workflow
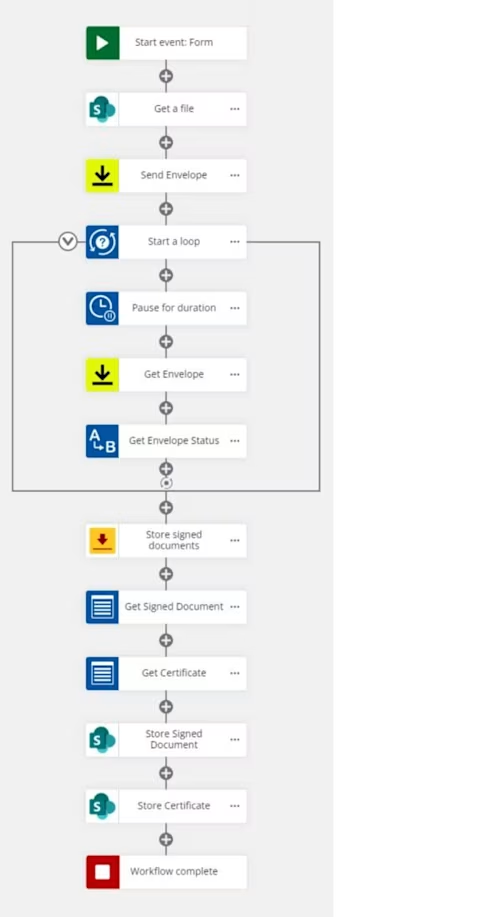
The final workflow should look like this:
Send envelope
This section will focus on these actions:

Start event (trigger): When a form is completed
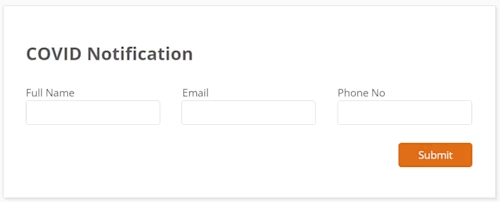
This is a basic trigger step, and could be whatever trigger you had as a business requirement. In this example, the HR Team needs each staff member to sign and confirm they have received the COVID vaccine.
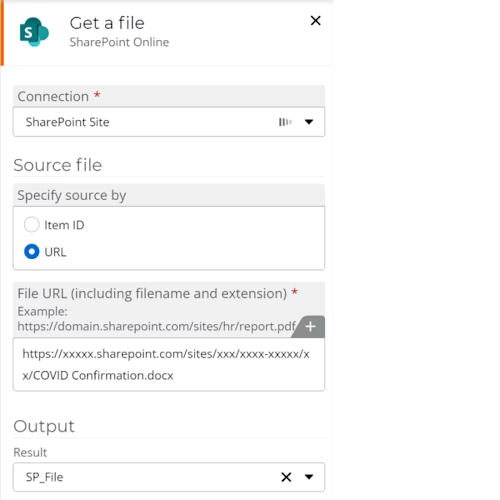
Get a file
This step is required to get the confirmation document from SharePoint. Below is the setup from my example:
Send Envelope
Search and select Send Envelope.

Drag the action below the step Get a file.

Create a new connection. Provide a connection name (such as System Login), then log in with your system sender account (generic user login). You will need to create one in Docusign if you haven’t done so already.
Now add the following values:
Documents
Select Add item
Account id: Account ID (captured earlier)
Document base 64: (The SharePoint file from the “get a file” step; for example, “SP_File”)
documentId: 1
fileExtension: txt
name: Confirmation
order: 1
emailSubject: COVID Vaccine Confirmation letter
Recipients
Select Signers > Add item
email: (email from form)
name: (full name from form)
recipientId: 1
roleName: Signer 1
routingOrder: 1
Access code: optional password for recipients
Additional notifications
Select Add item
Secondary delivery method: SMS
Country Code: (country code from form)
Number: (phone number from form)
Carbon copies (optional; for example, to notify the HR team)
Select Add item
Email: (recipient email; for example, hr@tally.com)
Name: (recipient name; for example, HR Team)
RecipientId: 2
roleName: Signer 2
routingOrder: 2
Status: sent
Output: Assign a variable
Using the Add item option, you can add multiple documents and recipients to a single envelope, giving you the flexibility to automate even more. This is one of the advantages of this solution compared to any OOB eSignature solution in Nintex today.
Now save and test it before moving to the next step.
The sections below show how to store the file in SharePoint. You can use Agreement Actions to achieve the same result, as well as automate many other post-signing actions. Where you wish to have more control, such as adding custom metadata to stored files or initiating other downstream processes directly with Nintex, the steps below will give you that capability.
Get envelope status
This section will focus on these actions:
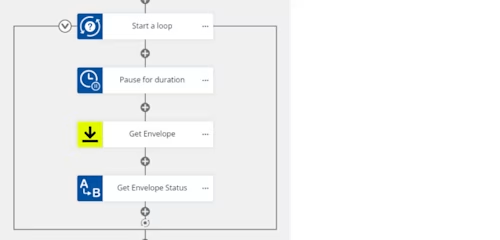
Start a loop
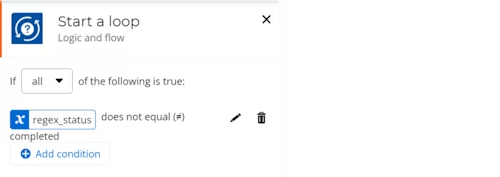
This will keep checking if the envelope status = completed. You will need to add the condition at the end once you define the regex_statusvariable.
Pause for duration
The minimum time you can pause is 15 minutes based on current API call limits; the recommended time is 20 minutes.
Get envelope
Add the custom action. This will retrieve the envelope status (with some help from the next step).

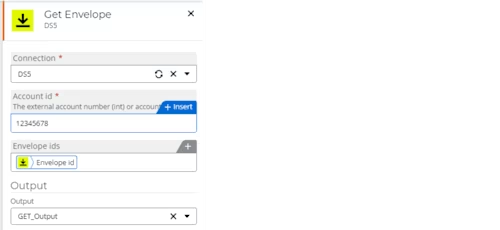
Add the following input:
Connection: The same as in the “Send Envelope” action.
Account id: Captured earlier when you set up your Docusign account
Envelope ids: This is the output from the “Send Envelope” step earlier:

Output: Set an output variable (such as
GET_Output)
Apply a regular expression
This is used to get the envelope status.
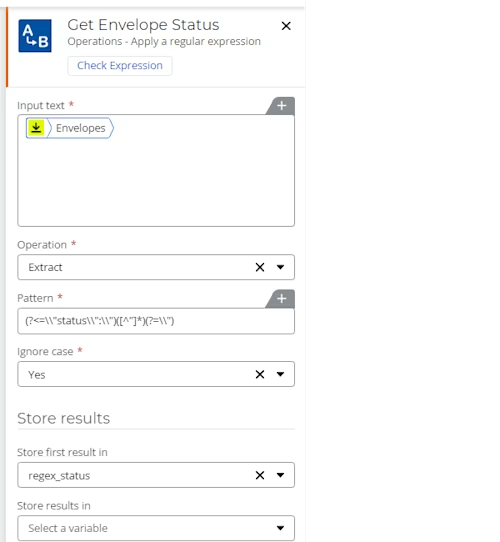
Add the following values:
input text:
GET_Output > Envelopesvariable

Operation: Extract
Pattern:
(?<=\\"status\\":\\")([^"]*)(?=\\")Ignore case: yes
Store first results in:
regex_status(this is used in the “Start a loop” action)
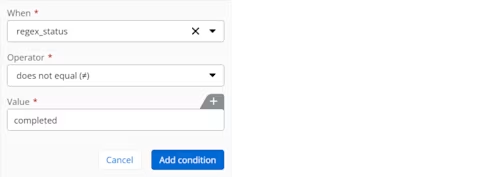
Now go back to the “Start a loop” action and add the condition:
when:
regex_statusOperator: does not equal
Value: completed
Note: You may want to add an exit step in your loop, (for example, “exit after 30 days”), as this is potentially an infinite loop.
Save and test it.
Store documents
This final section has been configured to store both the signed document and the certificate of completion in SharePoint into a folder of the recipient’s name.
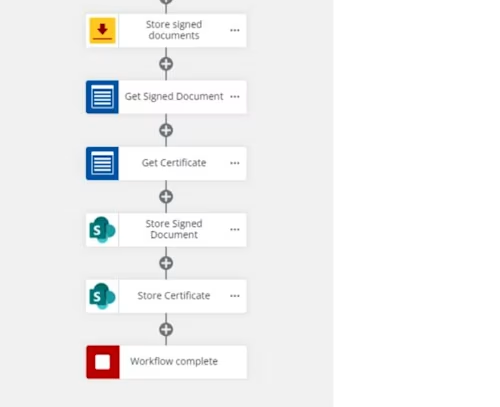
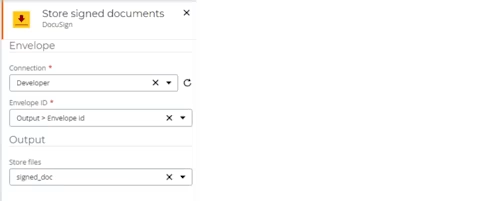
Store signed documents
This is a standard action already available in Nintex. Just search and add it.

Add the following values:
Connection: Since this is a standard action (not a custom one), you can’t reuse the connection made earlier, unfortunately. Not to worry: simply create a new connection with your same credentials and save it as a one-time step.
Envelope: Output > Envelope id (it’s the output variable from “Send Envelope”)
Store files: Create a collection variable (since it’s two documents); for example,
signed_docs
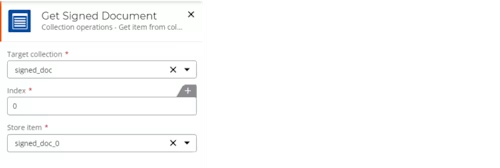
Get item from collection
This is for the signed document. To get the signed document, set Index to 0.
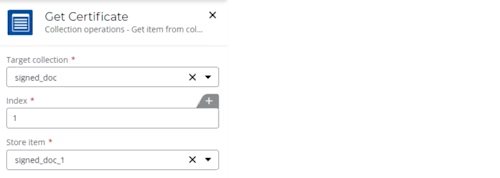
Get item from collection
This is for the certificate of completion. Add the same action again, and change Index to 1.
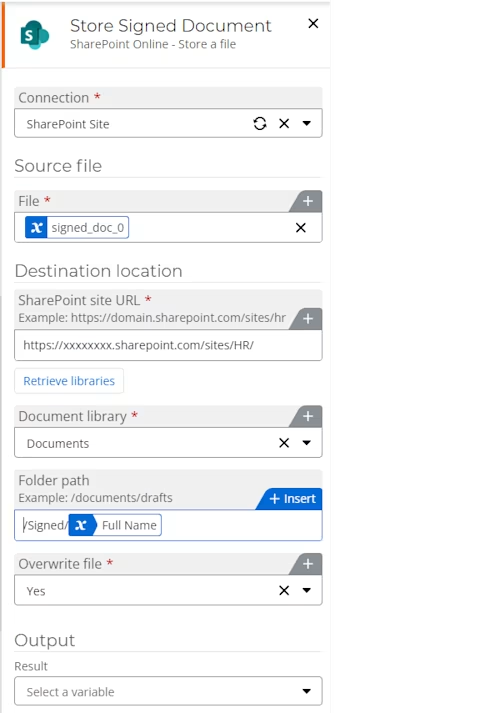
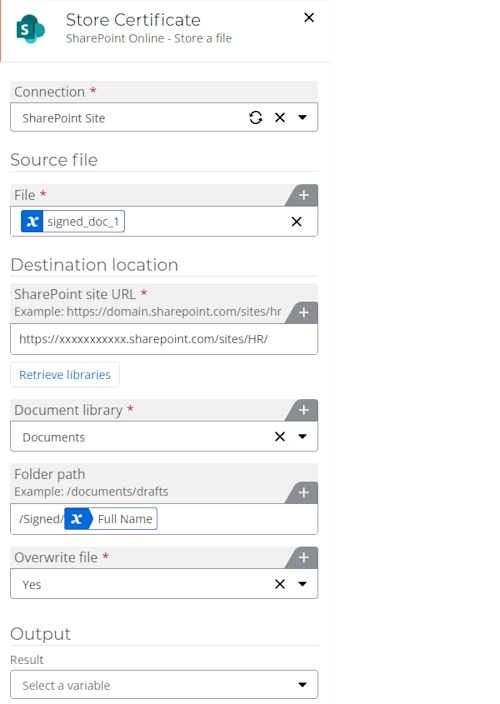
Store a file (SharePoint)
This is to store the signed document.
Add the following values:
Connection: Use an existing connection, or create a new one.
File: From the previous step (where Index is 0)
SharePoint site URL: This is your own SharePoint site.
Document Library: Select your own library to store the documents.
Folder path: I’ve chosen to have a separate folder for each staff member (based on the form that was completed at the start). How you set your path depends on how you’d like to store the files. You can create one per envelope, by creating a folder based on the envelope id variable.
Overwrite file: This is up to you, if you want any old files to be overwritten.
Store a file (SharePoint)
This is to store the Certificate of completion. Follow the steps as above, except changing the source file to be the “Index=1” file captured in the previous step.
Note: If there are multiple documents in the envelope, the certificate will always be the final document in the collection.
Now save and run the entire workflow!
Additional resources

Mo is a Principal Solution Architect with over 20 years of experience working with companies of all sizes, helping them realise their digital strategies. Mo is based on Australia, loves all things low-code, architecture, and is currently attempting to master the art of dad jokes.
Related posts
Docusign IAM is the agreement platform your business needs


