How to Send Documents for Electronic Signature in Google Drive and Gmail
With Google Workspace and Docusign for Google app, you can easily electronically sign documents, send documents from within Google Drive, Gmail and Docs.

With Google Workspace and Docusign for Google app, you can easily electronically sign documents, send documents from within Google Drive, Gmail and Docs.
Want to spend less time managing documents and more time focusing on your business? With the newly announced Google Workspace and Docusign for Google app, you can quickly and easily electronically sign documents, send documents out for signature and take critical actions from within Google Drive, Gmail.
Google Workspace makes it easy to sign and send documents like sales contracts, employee agreements or non-disclosure agreements for signatures directly from Gmail or Drive and avoid having to switch between apps. Select documents, add recipients and include an email message without ever leaving your Google application. Electronic signatures are widely recognized and accepted throughout the industrialised world, and they're also more secure than traditional paper-based signatures and thus less susceptible to forgery.
Install the Docusign for Google app from the Add-on Marketplace
Anyone with a Google Account can use the Add-on Marketplace. Once you have installed the Add-on, it is accessible through the App Launcher. You can use the Docusign app in Drive and Gmail.
Once you install the Add-on you can connect it with your Docusign account (or create a new Free account, if you don’t yet have one).
Go the Google Workspace Marketplace
Search for Docusign eSignature for Gmail and Drive
Click Install
Return to Gmail or Drive and reload the page
The icon for the Docusign app will appear on the Add-on side bar at the right

Sending documents for signature with Gmail is free and easy
To send documents with Docusign for Gmail, you will need a Google account and a Docusign account. You’ll get a free Docusign plan with three free sends so you can try the full Docusign experience. See for yourself how easy it can be to get business done faster.
To send documents from Gmail:
Open Gmail and sign in
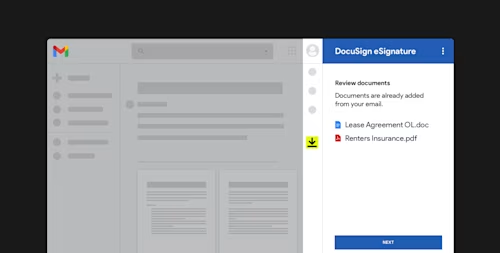
Click the Docusign icon in the Add-on tray at the right of the window to open up the Docusign card.
Select an email with one or more attachments
The attachments appear under Review documents in the Docusign Add-on. If you remove a document, you can always restore it by clicking RESET. You can only add attachments from the email you’ve selected.
After you click NEXT:
If you are the only signer, click SIGN to begin the signing process
If you want to add an additional recipient, click ADD RECIPIENT and enter the name and email address
Click ADD to add the new recipient. When you are done adding recipients, click NEXT
Enter the optional subject or message text and click OPEN APP to open a separate Docusign window and complete the Docusign sending process. When you are done, the Docusign window will close automatically.

Signing documents in Google Workspace is always free and saves time
Tired of printing, signing and faxing email attachments? With the Docusign integration for Gmail and Drive, anytime you receive a message with a signature-requiring document just click the Docusign icon in the side panel in Gmail.
Docusign will confirm it has all the details right, then open a new window where you can apply your signature. If you like, you can even customise and store your signature for faster future stamping.
Once you’re done, you can view and download the document from Docusign or send the signed document attached to an email with just one more click.
The Docusign add-on also allows you to request signatures from other people, if you frequently find yourself on that end of the equation.
Docusign lets you sign as many documents as you need for free. Requesting signatures is limited to three free sends, with higher-limit paid options starting at $10 per user per month.
Sending documents for signature with Google Drive streamlines your workflow
To send documents with Docusign through Drive, you will need a Google account and a Docusign account. To send documents from Drive:
Log in to Drive.
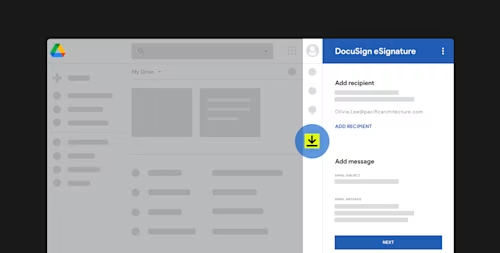
Click the Docusign icon in the Add-on tray at the right of the window to open up the Docusign Add-on for Drive:
Select one or more documents from the file list (not from the Quick Access section).
Docusign for Drive automatically adds the Docusign account owner and the document owner to the recipient list. Additional name and email suggestions are based on the Drive owner's Google Contacts. To add additional recipients, click ADD RECIPIENT and enter the recipient's name and email address. Click ADD when you are done.
Click NEXT when you have finished adding recipients.
In the next step, add a subject for the email as well as an optional message for the recipients.
Click OPEN APP to open a Docusign window to complete the Docusign sending process. When you are done, the Docusign window will close automatically.
Get Started with Docusign eSignature for Gmail and Drive today!
Related posts
Docusign IAM is the agreement platform your business needs


