Our newest sample app featuring our newest API: MyWebForms
MyWebForms replaces our original LoanCo sample app to show you how Docusign web forms can be used to populate documents for embedded signing and focused view.

In February 2024 we announced the new Web Forms API. Today, we’re excited to announce our newest sample app that utilizes that API: MyWebForms. MyWebForms is built with React.js and the .NET Web API. It uses the Docusign C# SDKs for both the eSignature REST API and the Web Forms API.
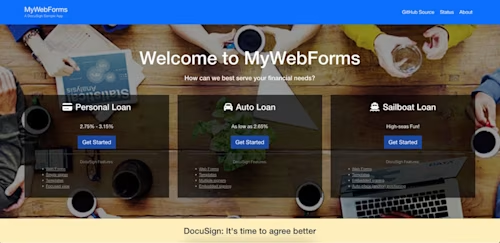
If the screenshot of MyWebForms above looks familiar to you, that might be because you’ve seen our oldest sample app, LoanCo. MyWebForms illustrates how you can incorporate our Web Forms product into your applications while also utilizing much of the same eSignature functionality as LoanCo. When we designed LoanCo, we built our own forms into our HTML to collect input from the user. Then, when our backend code created envelopes with tabs using the eSignature REST API, we set the tabs’ value fields to that user input so the user’s information appeared in the document. This process was the status quo for feeding user input into documents for a long time. The introduction of web forms has made this process much more streamlined. Let’s take a look at how web forms are used in MyWebForms.
Web Forms implementation
The hosted version of the sample app uses web form configurations that already exist in the connected Docusign developer account. You can find the JSON files for these configurations in the source code of the sample app. The JSON config files can be uploaded to your own account to create the web form configurations that you need to run the sample app locally.
We use the Web Forms API Instances:createInstance method to create a new instance of the web form. The instance is unique to the current user who is filling out the form in the sample app. You can find detailed instructions on how to create a web form instance in our how-to guide. After an instance is created, it’s embedded on the page using Docusign JS. Docusign JS is a JavaScript client SDK that creates an iframe in which the web form instance is displayed, and then loads into it the web form instance URL that was returned from the createInstance method. Now that you understand what’s happening behind the scenes, let’s walk through what the user sees when they run one of the scenarios in the sample app.
When the user opens the scenario, they see the title page of the web form embedded on the page as shown in the screenshot below.
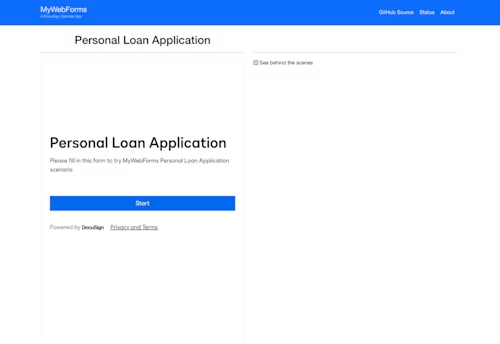
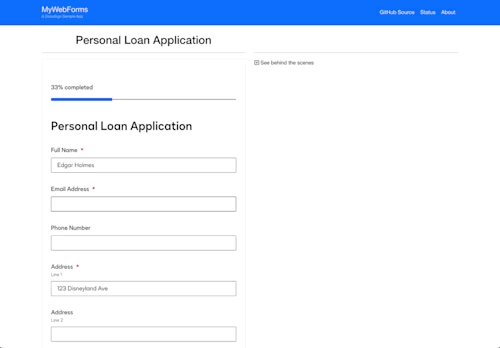
After selecting Start, the user will be prompted to fill out the form as shown in the screenshot below. The progress bar shows the user how much of the form has been completed. After the user completes the form, the envelope will be sent to the user.
Embedded signing with focused view
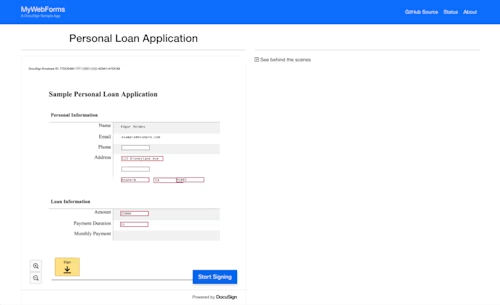
The Personal Loan scenario in MyWebForms demonstrates how focused view can be used to embed the signing experience after the user has filled out an embedded web form. After the form is complete, the document is embedded in the same iframe where the form was embedded, enabling the user to sign and complete the document. This iframe can be any size and can appear anywhere on your web page that you’d like. For this sample app’s purposes we kept the embedded form to one half of the screen so that our “behind the scenes” text could appear on the other half.
The information that the user enters in the web form is displayed in the document’s tabs. Unlike in LoanCo, where we had to define each tab’s value in the request body of the envelope, the web form automatically takes the user’s input and ports it into the tabs in the envelope.
The other two scenarios in MyWebForms showcase envelopes with multiple signers and demonstrate a classic embedded signing use case to allow both recipients to complete the document. Regardless of how the document is completed, all of the scenarios use web forms to collect user input and the Web Forms API with Docusign JS to embed the web form instances on the page.
Try MyWebForms out for yourself and you’ll see the magic of web forms. You can also compare MyWebForms to LoanCo to see how web forms can improve your existing eSignature integrations. Check out the source code on GitHub to learn more about the code that runs the app and to find instructions for how to run the app locally on your own machine. And be sure to visit the Docusign Developer Center to find a wealth of knowledge on how to use the Web Forms API.
Additional resources

Paige has been working for Docusign since 2020. As Lead Developer Advocate on the Developer Advocacy team, she writes content and code to help developers learn how to use Docusign technology, represents Docusign at community events, and supports Docusign developers on community forums.
Related posts
Docusign IAM is the agreement platform your business needs


